Introduction
Thank you very much for choosing our plugin. We truly appreciate and really hope that you'll enjoy our plugin!
If you like this plugin, Please support us by rating us 5 stars..
Whols - is an outstanding WordPress plugin for WooCommerce that allows store owners to set wholesale prices for the products of their online stores. This plugin enables you to show special wholesale prices to the wholesaler. Users can easily request to become a wholesale customer by filling out a simple online registration form. Once the registration is complete, the owner of the store will be able to review the request and approve the request either manually or automatically.
Whols Pro plugin reduces the hassle to create multiple stores for both the consumers and the wholesalers. By utilizing the functionality of this amazing plugin, you can easily maintain both the consumers and the wholesalers from a single store.
- By: HasThemes
- https://hasthemes.com/
- Email: [email protected]
- HelpDesk: https://hasthemes.com/contact-us/
Main Features
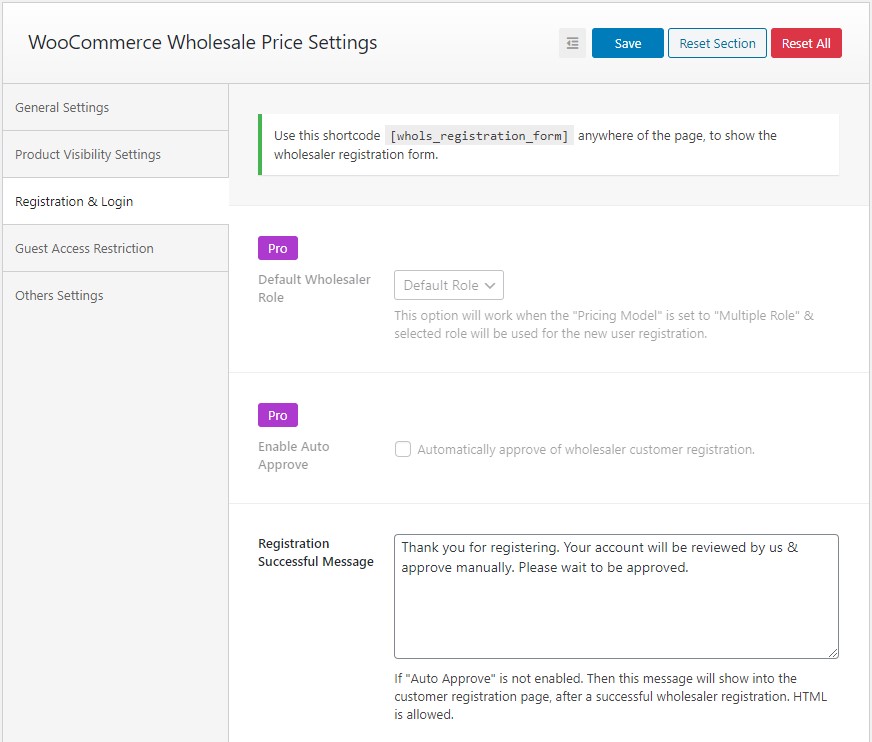
- Wholesaler registration form shortcode
- Customer can request to become a wholesale customer
- Admin can manage the wholesaler request manually OR Auto approve can be set
- Assign wholesale role for existing customers
- Apply wholesale prices globally
- Add flat/percent amount price on wholesale products
- Easily set wholesale prices on Simple or Variable Products
- Add wholesale prices to each variation of variable products
- Option to enable the minimum product to buy
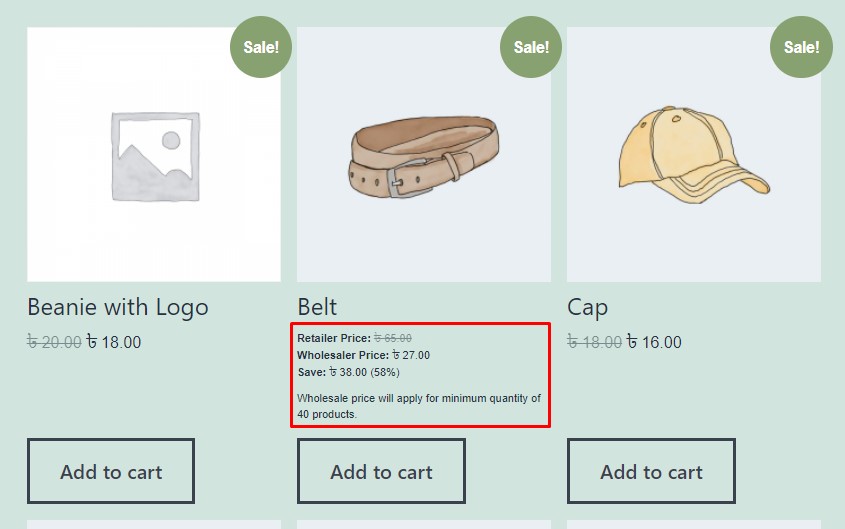
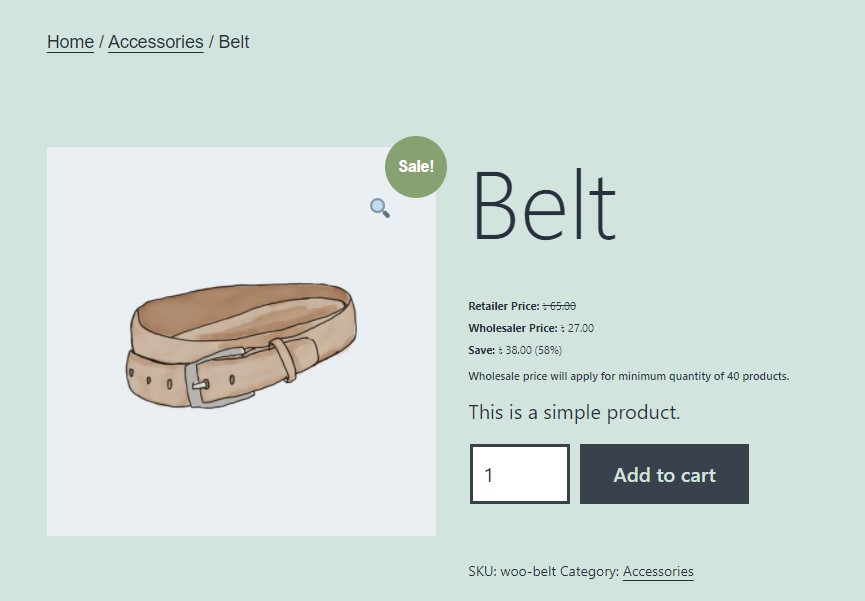
- Shows wholesale pricing info on the shop page as well as product details page
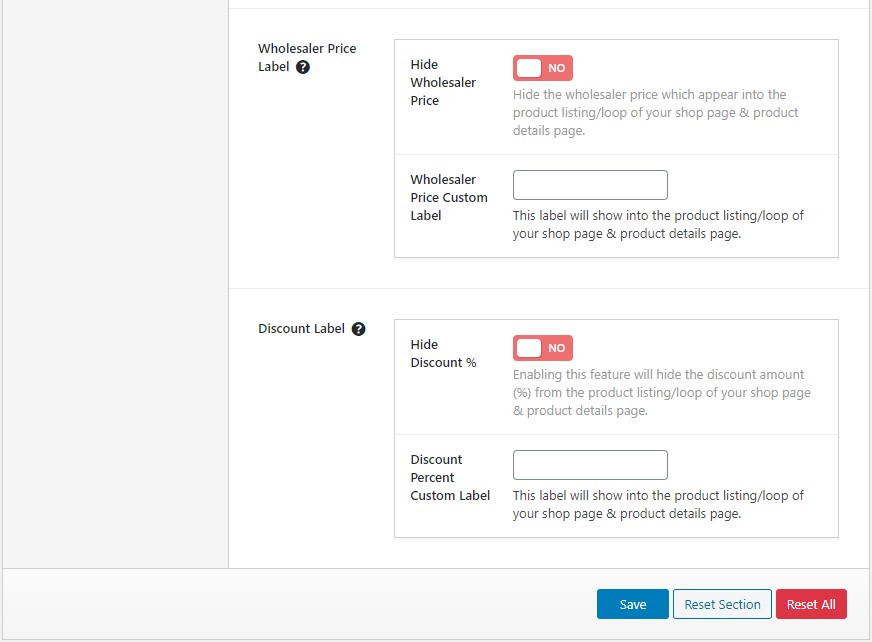
- Show/Hide the retailer price from wholesale customers
- Customers having wholesale role assigned can buy products at wholesale price
- Customize the text on the frontend labels (Retailer Price Text, Wholesaler Price Text & Save Amount Text Label)
- Display the amount that the customer will save after purchase
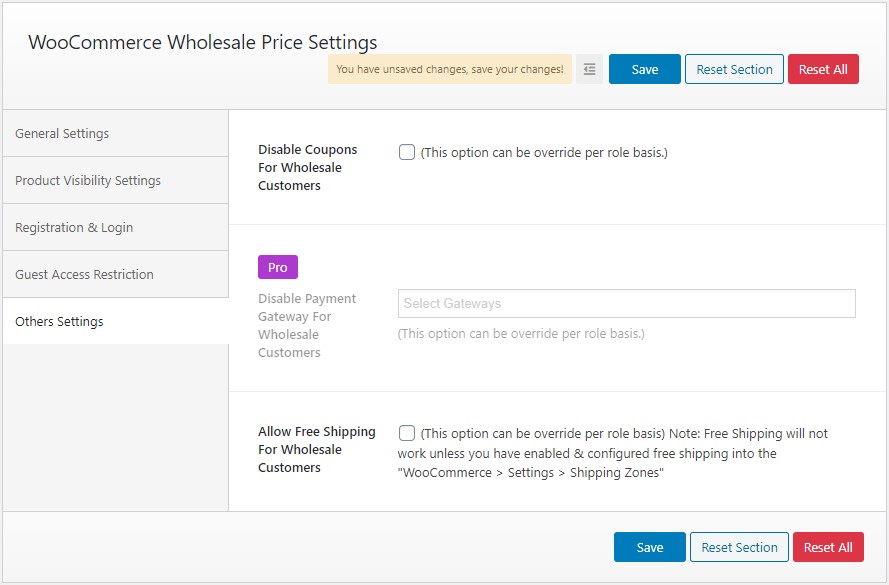
- Allow free shipping for wholesalers
- Disable coupon codes for wholesale customers so only retailers can use them
- Hide wholesale prices for guest user
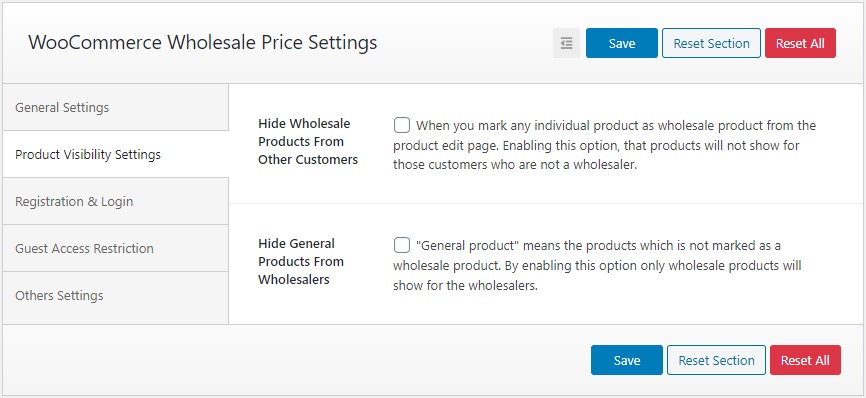
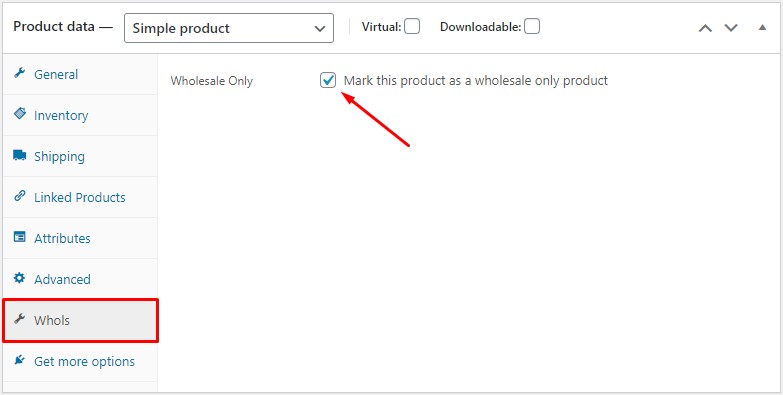
- Hide "Wholesale Only" Products From Other Customers
- Hide General Products From Wholesalers
- Wholesale prices are only visible to customers with “Wholesaler” role
- Registration successful message customization
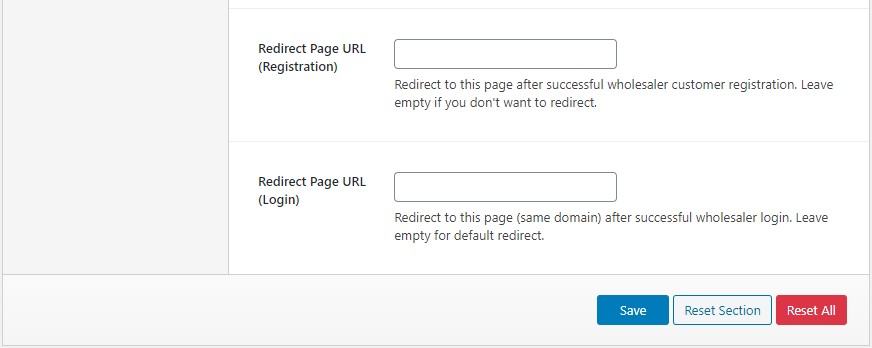
- Redirect to a specific page after completed registration
- Redirect to specific page when customer login as a wholesaler
- Hide price for guest users (Login to see price)
- Easy to use backend interface
- No coding required
Premium features
- Create & manage unlimited user role
- Wholesaler request management (Approve / Reject)
- Give different pricing to different wholesaler role
- Payment methods (gateway) control
- Different prices for different users
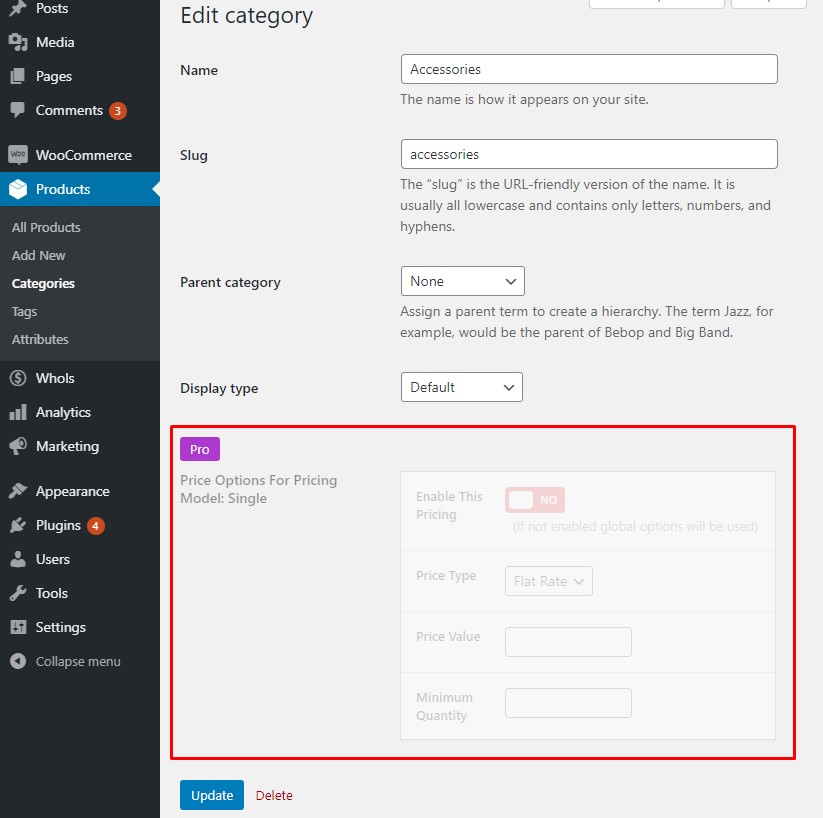
- Category wise product price set
- Category wise product price set for different roles
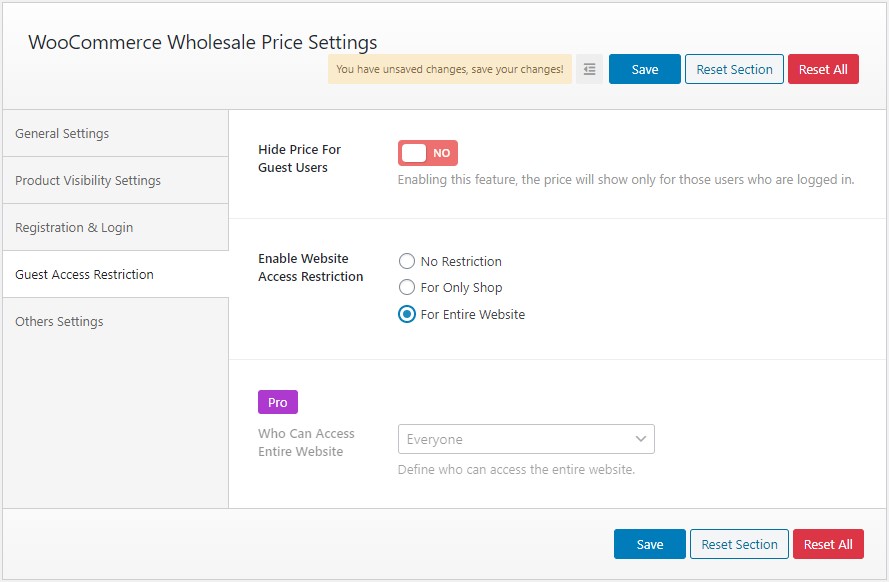
- Restrict wholesale store access
- Set default wholesaler role for wholesale registration
- Enable website access restriction (Entire Website / Only Shop)
- Who can access the Entire Website / Shop (Logged In Users/Logged In Users With Wholesale Role)
- Role wise disable payment method
- Role wise enable free shipping
Need Support?
If you have any questions regarding to theme issues, please submit a ticket at https://hasthemes.com/contact-us/System Requirements
- Wordpress 4.0 or Higher
- WooCommerce 4.0 or Higher
- PHP version 7 or greater
- MySQL version 5.6 or greater OR MariaDB version 10.0 or greater
Plugin Installation
To use this plugin you must have a working version of Wordpress already installed. If you need help in installing wordpress follow the instruction here: https://codex.wordpress.org/Installing_WordPress
Plugin Installation
Installing the plugins is just like installing other WordPress plugins. If you don't know how to install plugins, please review the two options below:
Install
- Go to the WordPress Dashboard "Add New Plugin" section.
- Search For "Whols".
- Install, then Activate it to enable its features.
Install after download the plugin
- Unzip (if it is zipped) and Upload `whols ` folder to the `/wp-content/plugins/` directory
- Activate the plugin through the 'Plugins' menu in WordPress, to enable its features.
Configure
- To configure the plugin, follow the "Quick Start" guide.
Quick Start
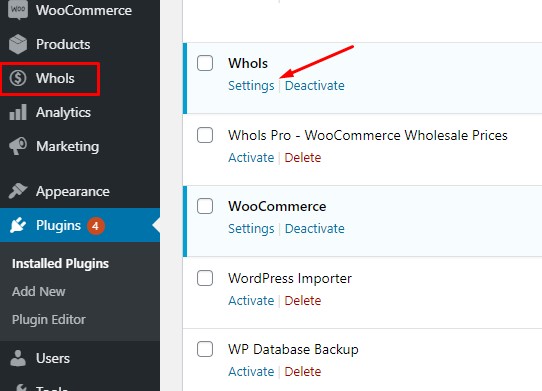
After activate the plugin you will get a new menu called "Whols" OR click on the "Settings" quick link which is located beside the "Deactivate" plugin link.
Follow the instructions below to enable wholesale features in your store as simple as it should be.
For Pricing Model: Single Role
- Navigate to "General Settings" > "Price Options For Pricing Model: Single Role"
- Apply wholesale prices globally
- Turn On the switch of "Enable This Pricing"
- Set "Price Type" to "Percent"
- Enter "Price Value" as your need. For example: if you enter 75. Then product price will be 75% of the existing price & wholesaler will get 25% discount.
- Enter "Minimum Quantity". For example: if you enter 10. Then wholesaler customer will need to add 10 quantity of a product into the cart otherwise wholesale price will not apply.
Note: Wholesaler customer will get a notice in the shop/product details about the minimum quantity to purchase. - Finally "Save" the settings. Wholesale price is now applied globally into the entire shop.
- Skip the above procedure if you want to set wholesale price for a specific product.
- Apply wholesale price for a specific product
- Create a new product OR Edit an existing product.
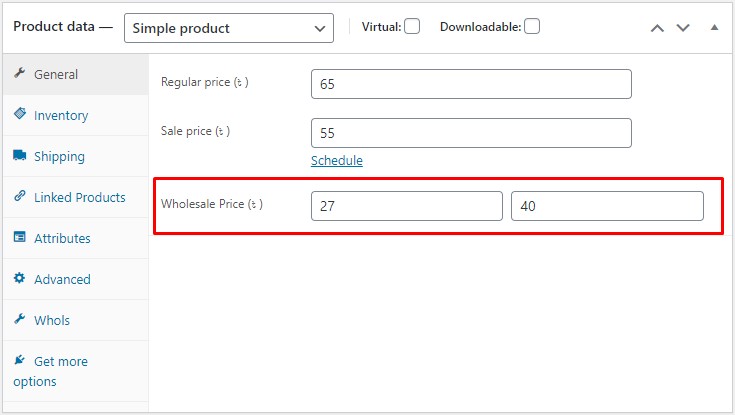
- For "Simple" product, set the wholesale price from the "Product data > General" tab. You will notice 2 new fields "Price" & "Min. Quantity" here. Enter the value here. Minimum quantity notice will show in the shop/product details page.
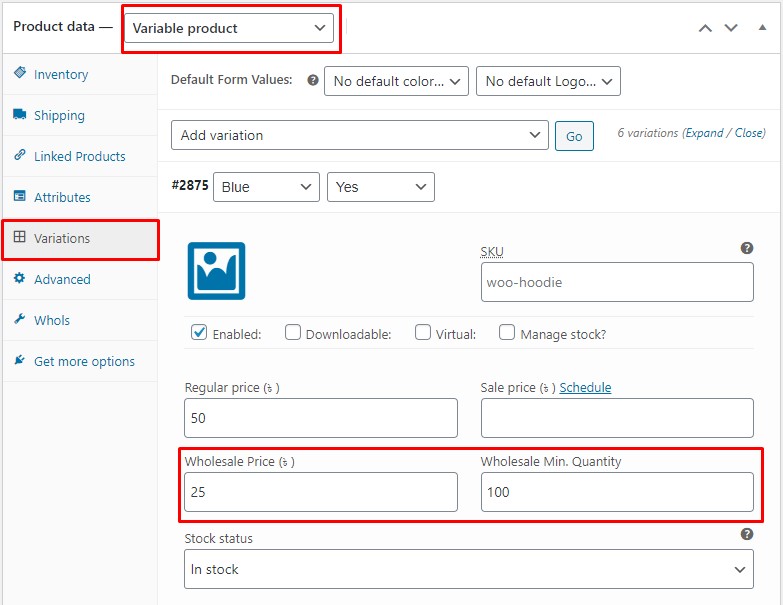
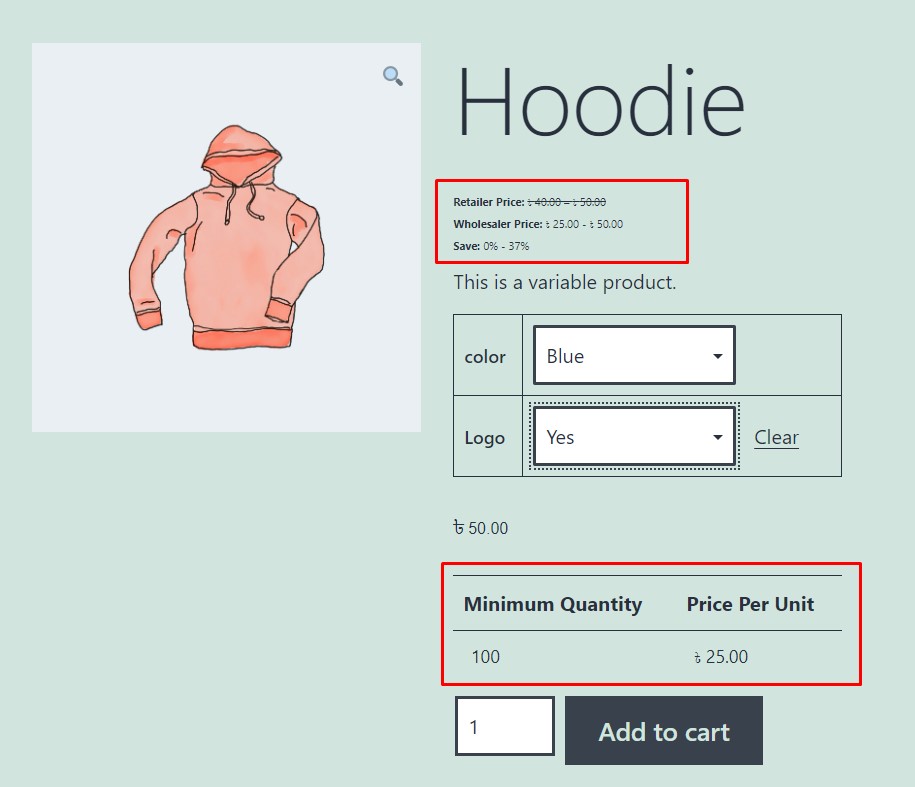
- For "Variable" product, set the wholesale prices from the "Product data > Variations" tab. You will notice 2 new fields "Wholesale Price" & "Wholesale Min. Quantity" below the "Regular Price" field with each variation. Enter the value for each variation. Minimum quantity notice will show after select the product variation into the product details page.
- Now you need to login as a wholesaler to see the wholesaler prices.
- Edit an existing user OR Create a new user from "Users > Add New" & Set the role to "Default Role - Whols Role"
- Now login to the shop as a wholesaler & look at the products. All the prices are set to your given price.
- Explore the other options for further customizations.
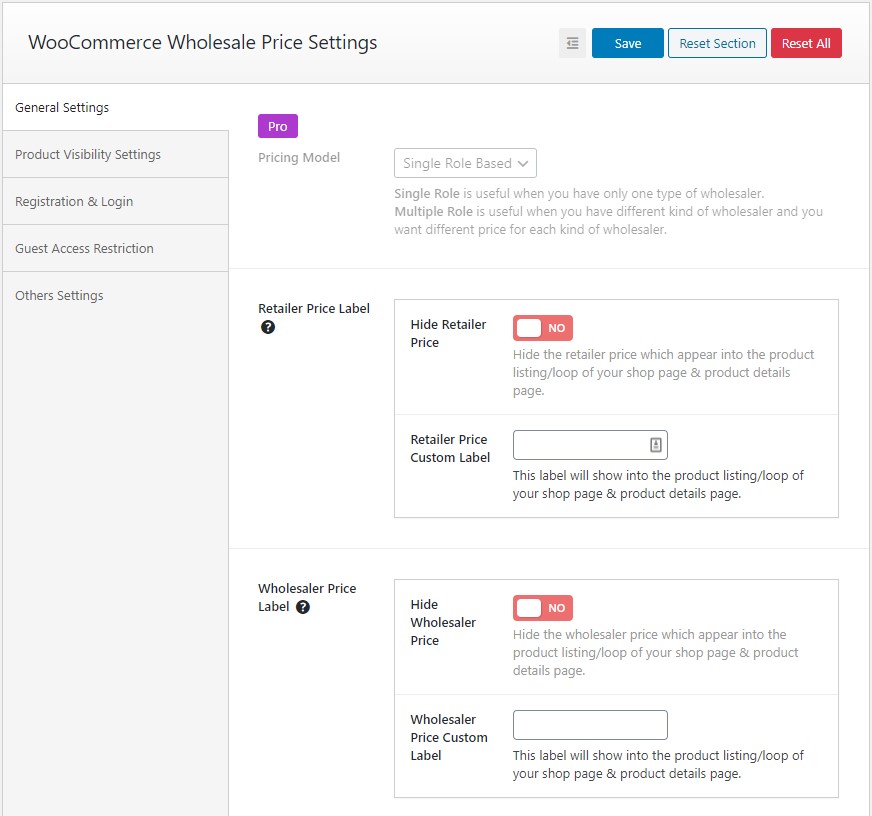
General Settings
Product visibility Settings
Registration & Login Settings
Guest Access Restriction Settings
Other Settings
Product Level Settings
Simple Product Settings
Product Category Settings
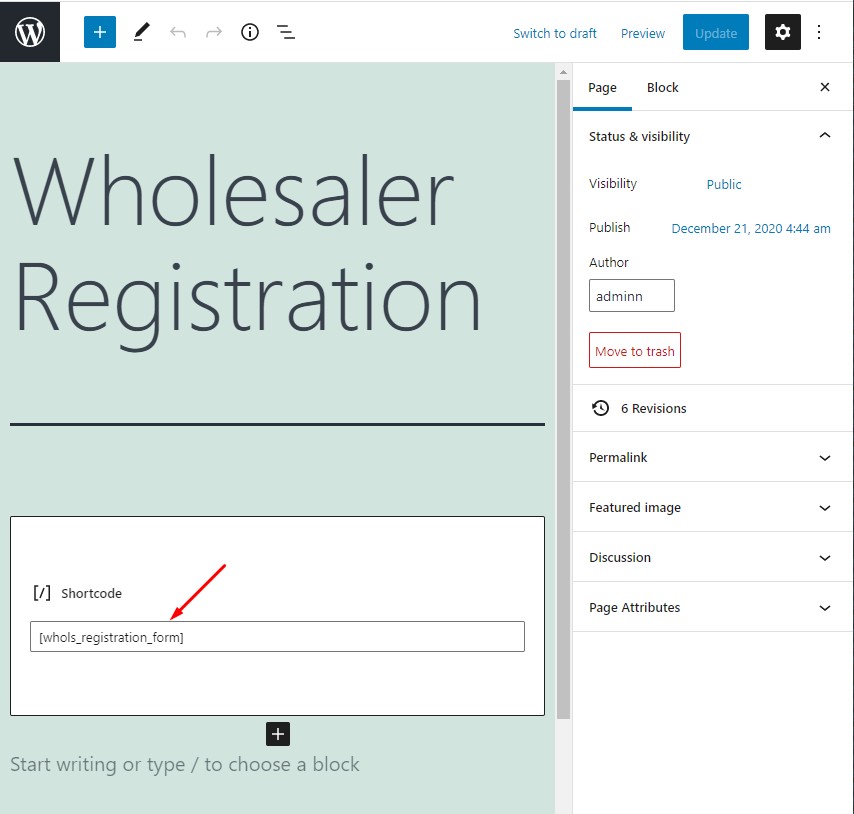
Registration Form Shortcode
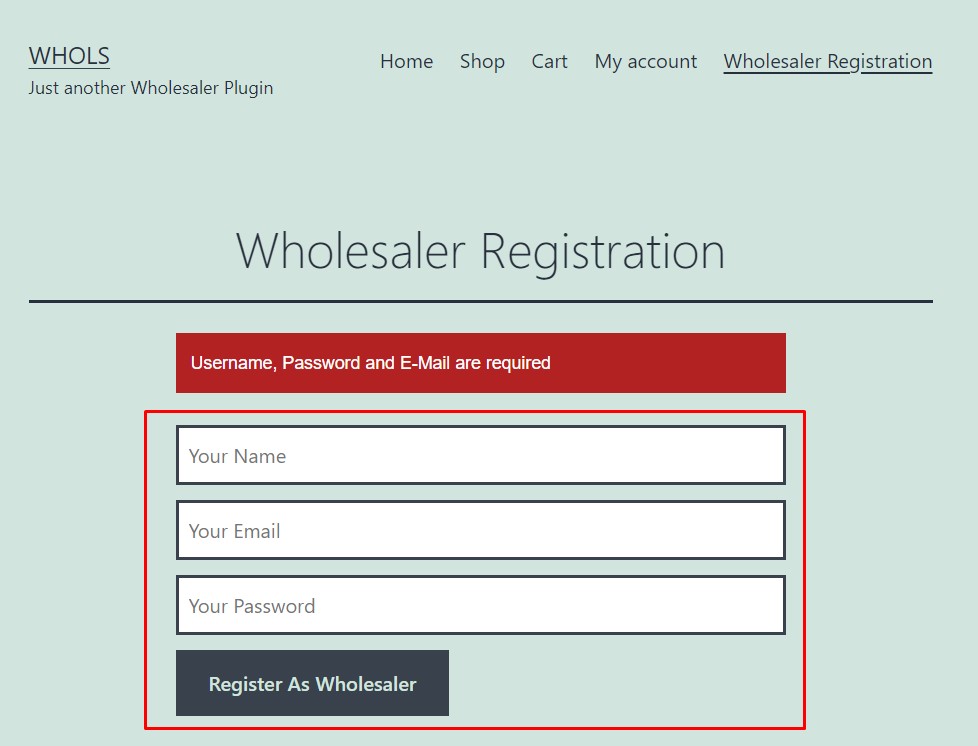
Registration Form Frontend
Registered User Pending for Approval
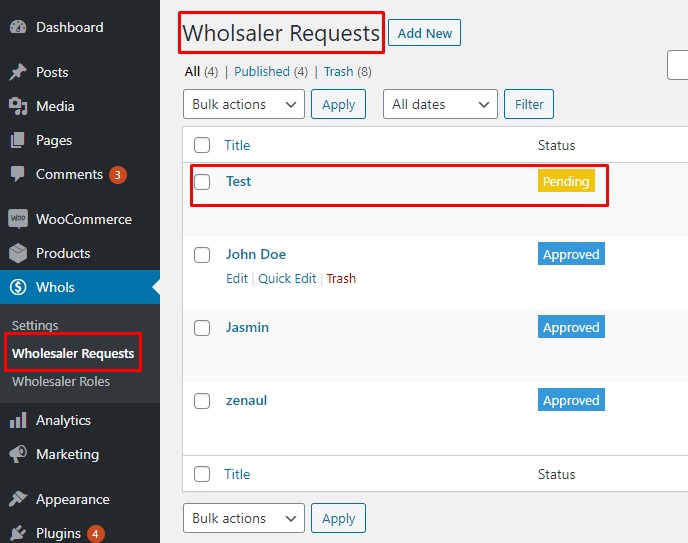
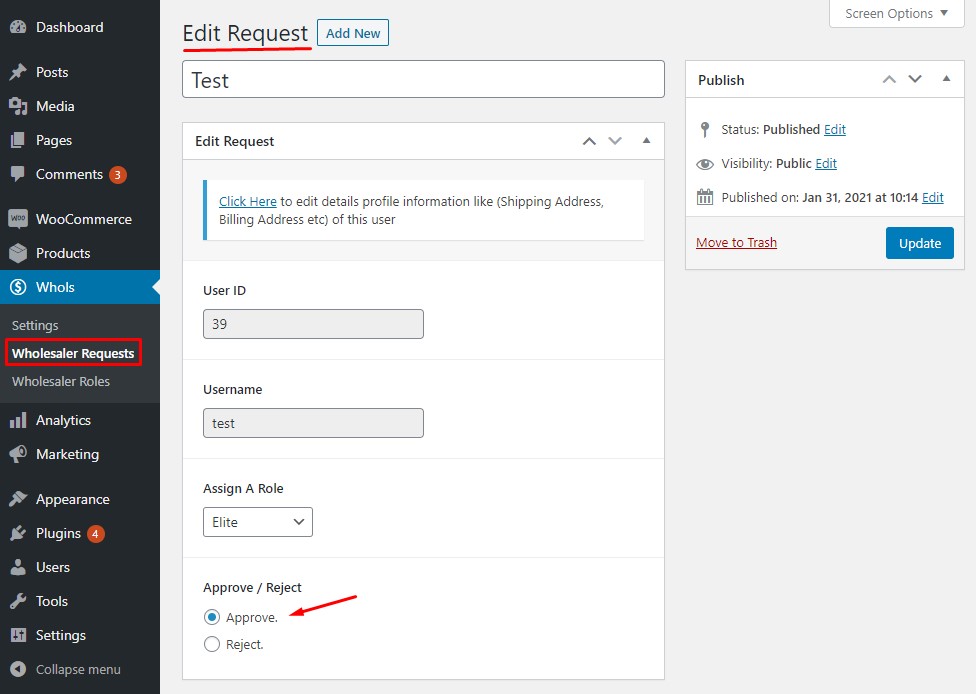
Approve Wholesaler Request
Add additional fields into the registration form
Adding additional field can be added by using the filter hook called "whols_registration_fields". Please follow the example below to add a additional field.
add_filter('whols_registration_fields', 'add_additional_fields', 10, 1);
function add_additional_fields( $fields ){

    // text type field
    $fields['addition_field_1'] = array(
        // required parameters
        'label'         => __( 'Additional Field 1', 'text_domain' ), // Field label shown in backend & frontend
        'type'          => 'text', // filed type
        'priority'      => 1, // order number of the field
        'is_additional' => true,  // state that this field is additional

        // optional parameters
        'placeholder' => '',
        'class'       => array(),
        'label_class' => array(),
        'input_class' => array(),
    );

    // select type field
    $fields['addition_field_2'] = array(
        // required parameters
        'label' => __( 'Business type', 'text_domain' ), // Field label shown in backend & frontend
        'type'  => 'select', // filed type
        'options' => array(
            ''               => __('Select', 'text_domain'),
            'individual'     => __('Individual', 'text_domain'),
            'corporate'      => __('Corporate', 'text_domain')
        ),
        'priority'      => 2, // priority of the field
        'is_additional' => true,  // state that this field is additional
        'required'      => true, // must select a value

        // optional parameters
        'placeholder' => '',
        'class'       => array(),
        'label_class' => array(),
        'input_class' => array(),
    );

    // Checkbox type field
    $fields['agree_terms'] = array(
        // required parameters
        'label'         => 'Terms and Conditions', // Field label shown in backend & frontend
        'type'          => 'checkbox', // filed type
        'priority'      => 99, // order number of the field
        'is_additional' => true,  // state that this field is additional
        'description' => 'I agree to the terms and conditions.',

        // optional parameters
        'required'    => true,
        'class'       => array(),
        'label_class' => array(),
        'input_class' => array(),
    );

    // Example of using WooCommerce customer address fields
	// This bit of code will add a new field called "Billing Company" to the registration form.
	// After fill-up the registration form it will appear under the "Customer Billing Address" fields rather than in the additional fields area.
	$fields['billing_company'] = array(
	    // required parameters
	    'label'         => __( 'Billing Company', 'text_domain' ), // Field label shown in backend & frontend
	    'type'          => 'text', // filed type
	    'priority'      => 1, // order number of the field
	    'is_additional' => false, // state that it is not additional field

	    // optional parameters
	    'required'    => true,
	    'placeholder' => '',
	    'class'       => array(),
	    'label_class' => array(),
	    'input_class' => array(),
	);

    return $fields;
}
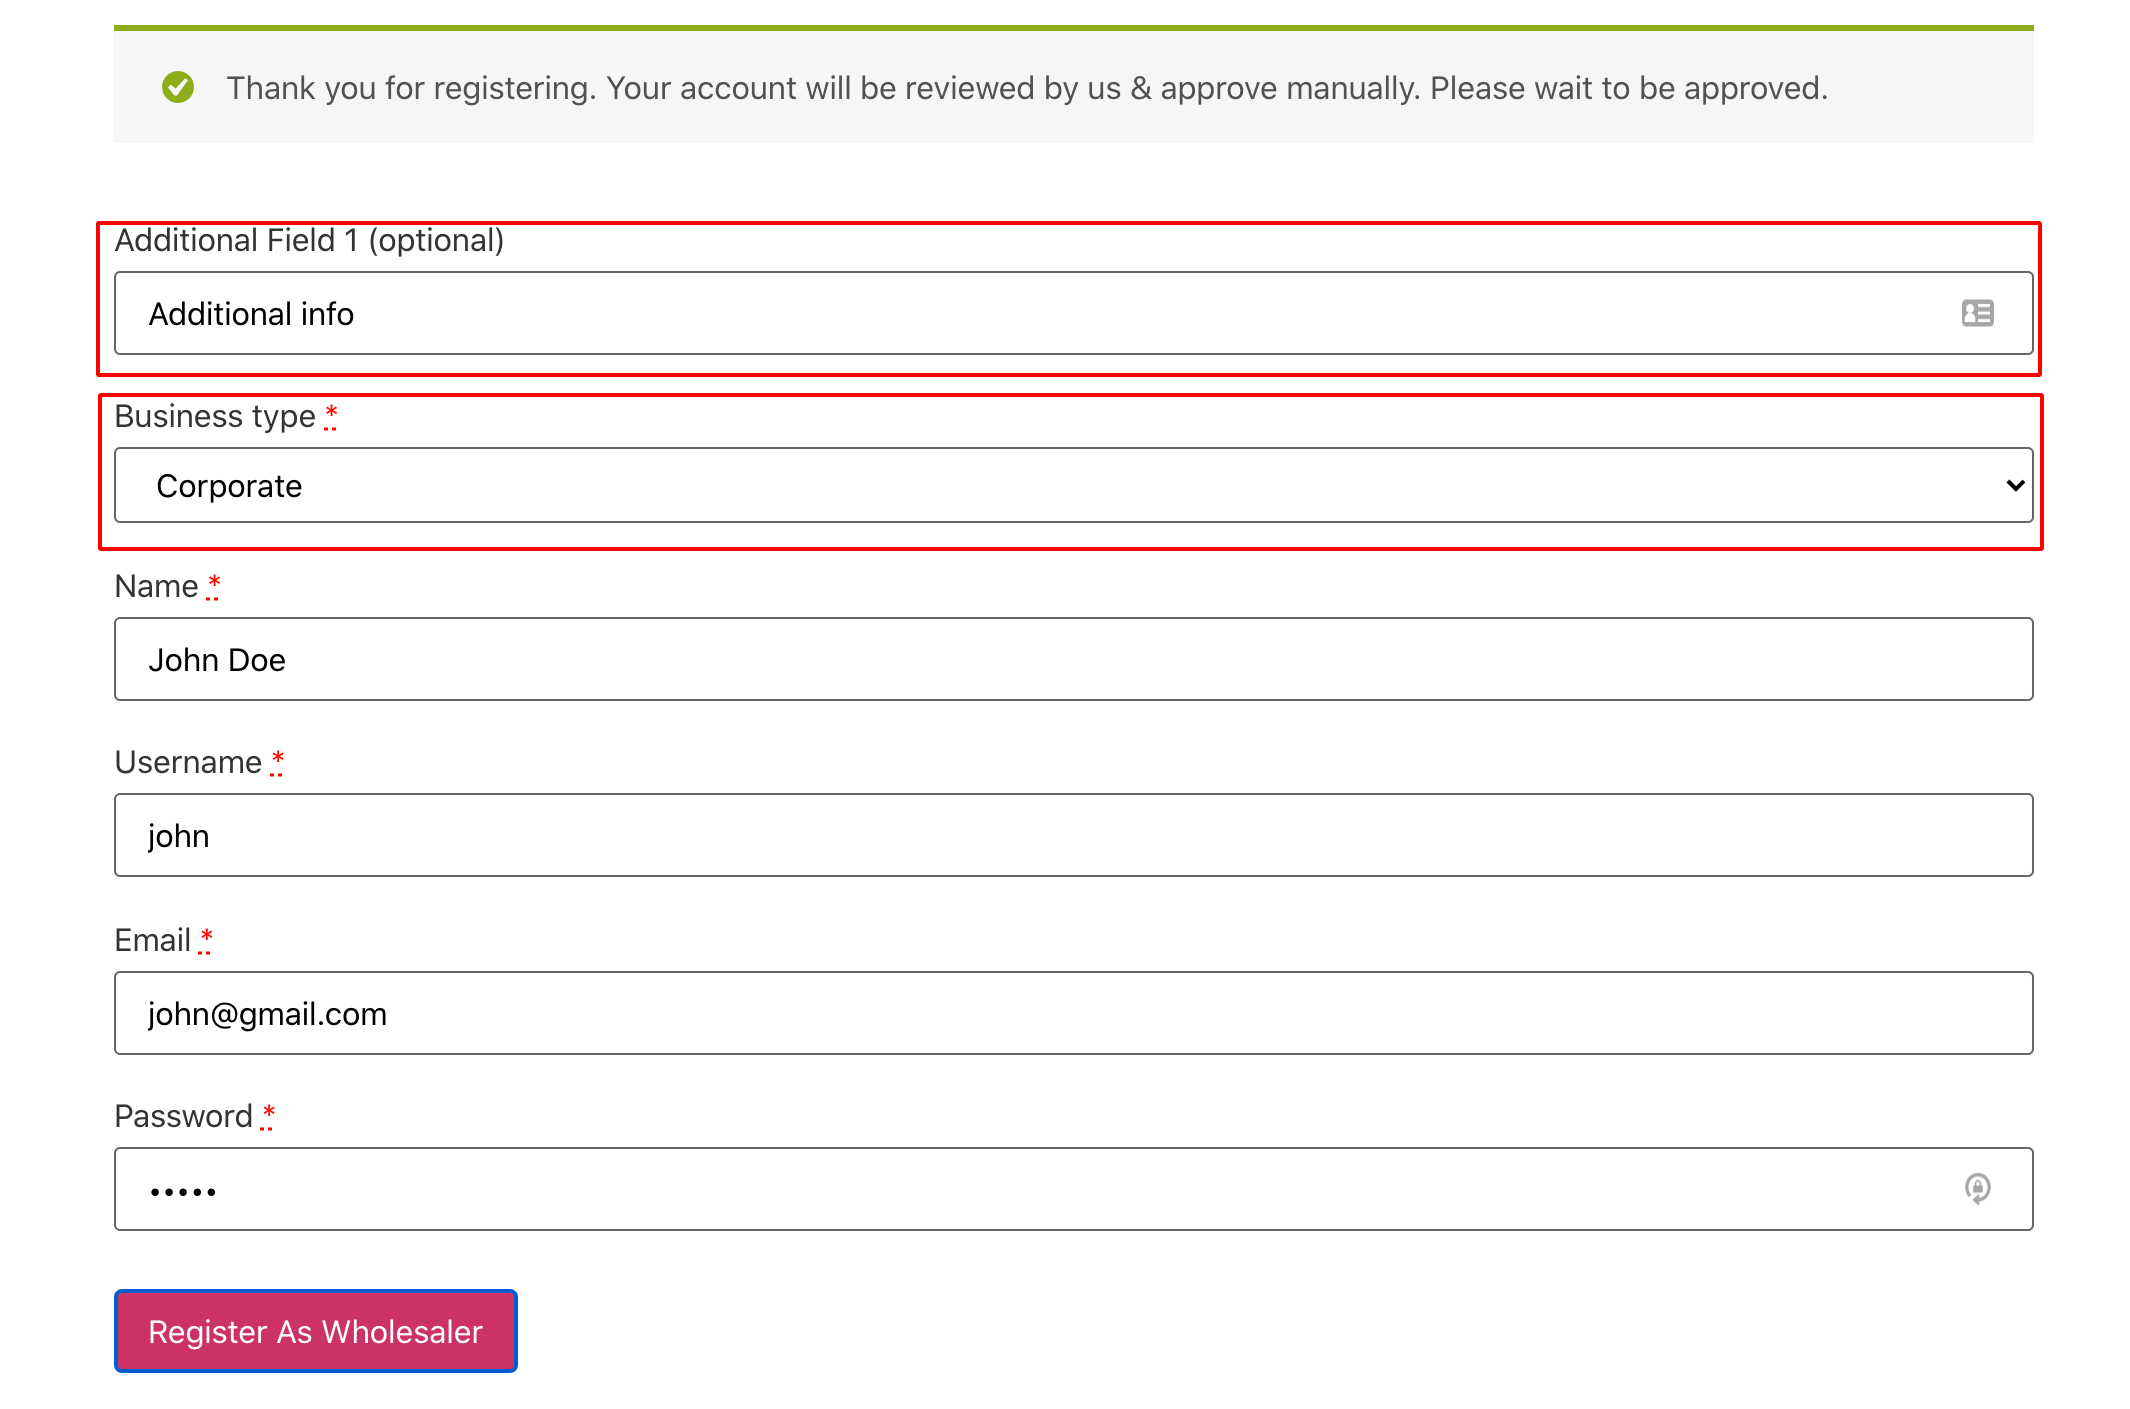
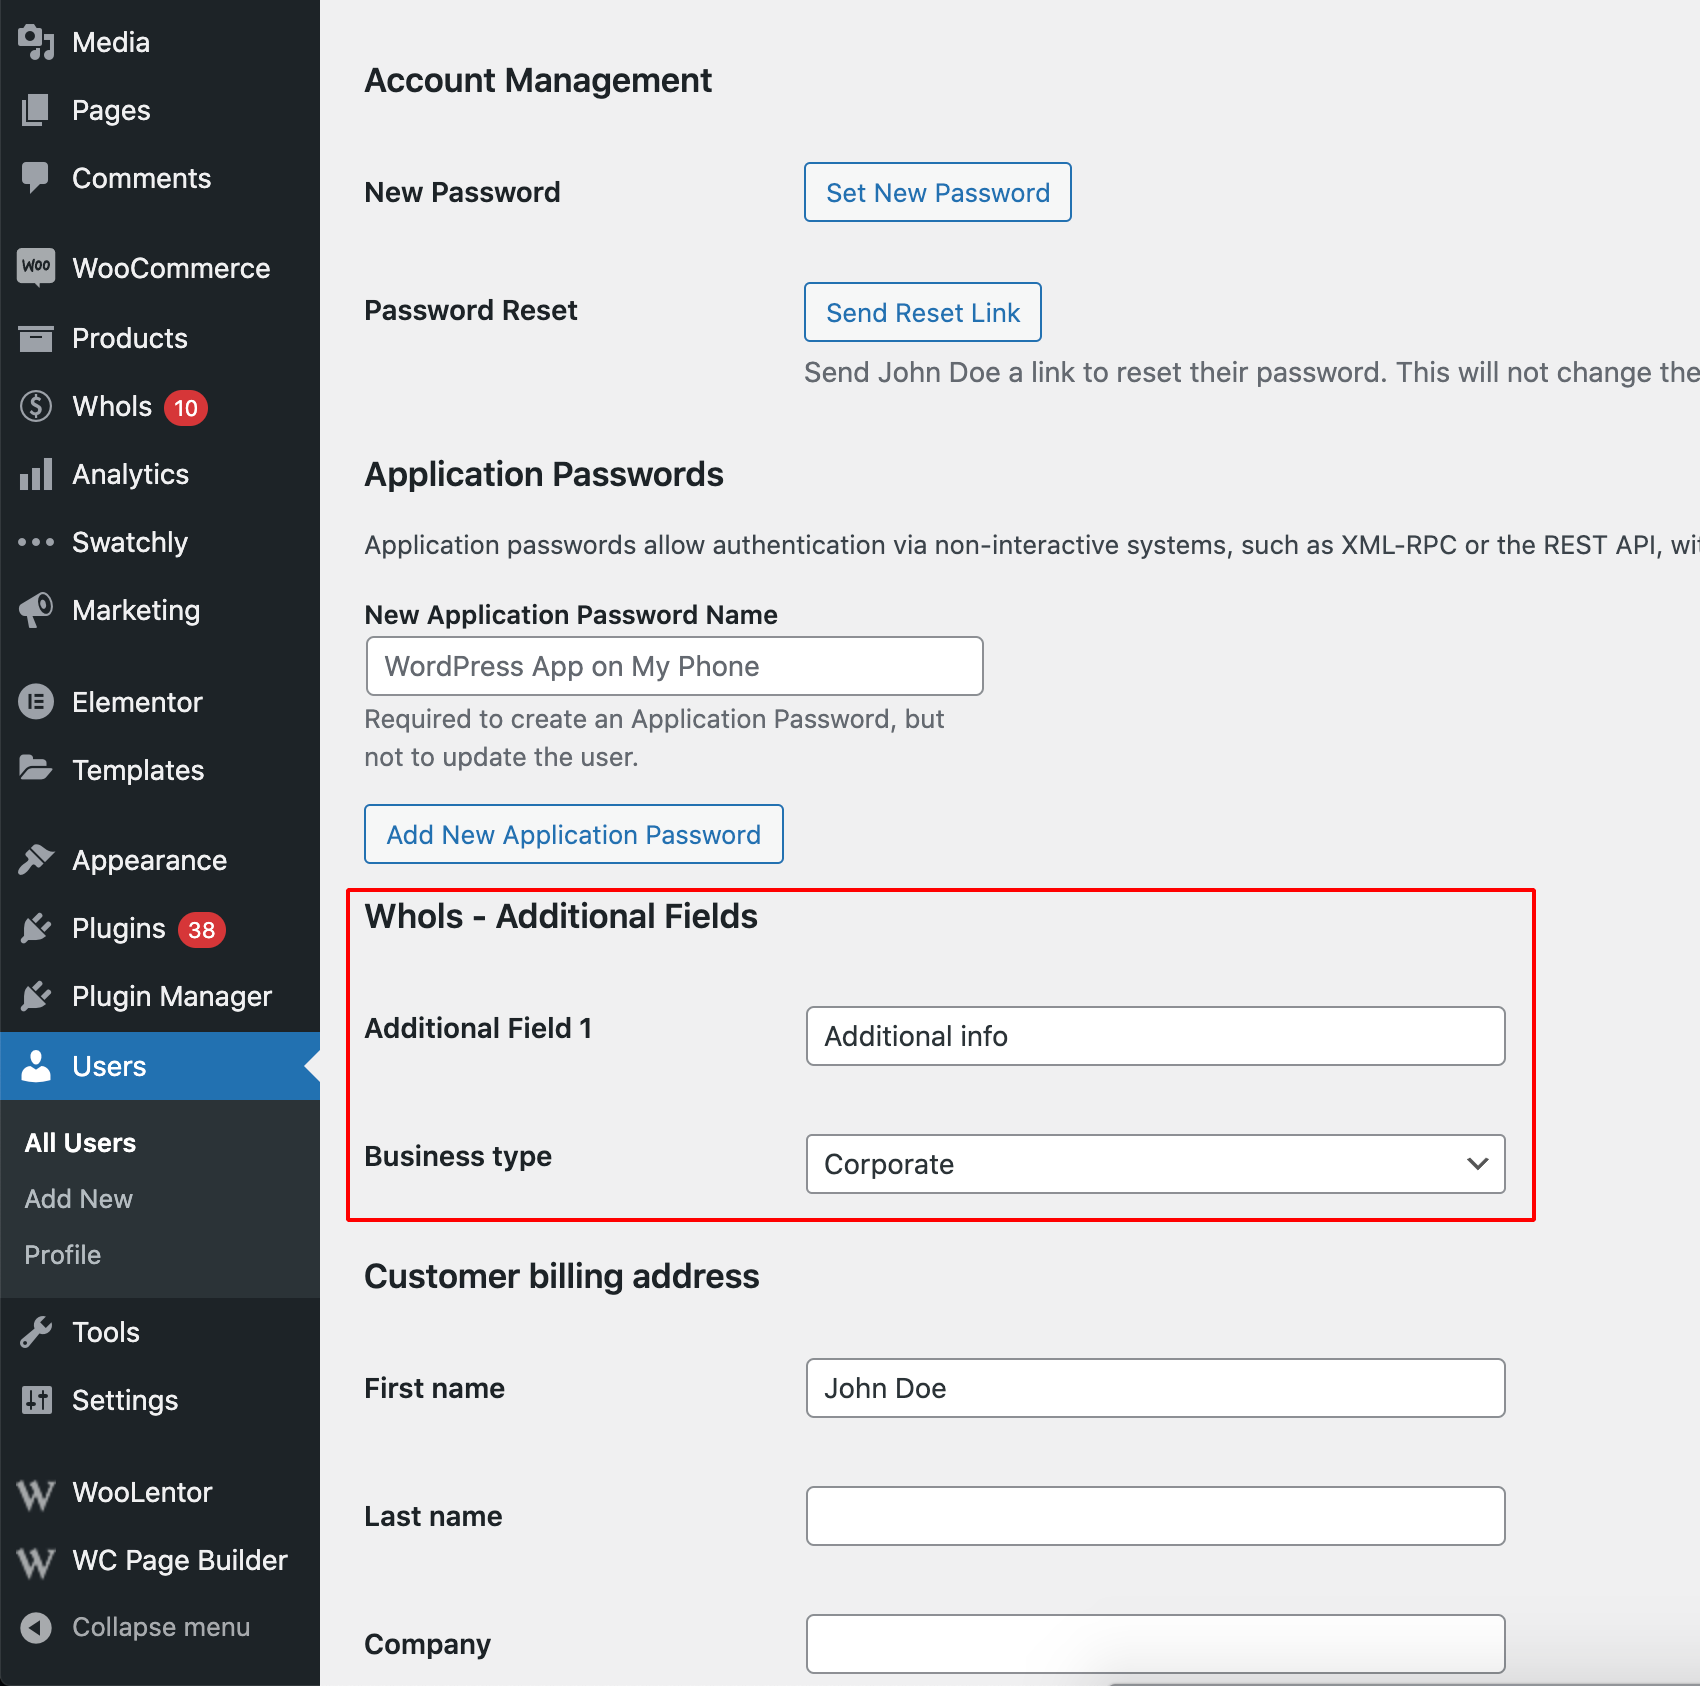
The above sample code will add 2 new fields at the first of the registration form. We recommend to add the sample code in your child theme's functions.php or your site-specific custom plugin.
Otherwise, the customizations might lose after the theme/plugin update.
Please check the screenshots below to see how it looks in frontend and backend.