Step One:
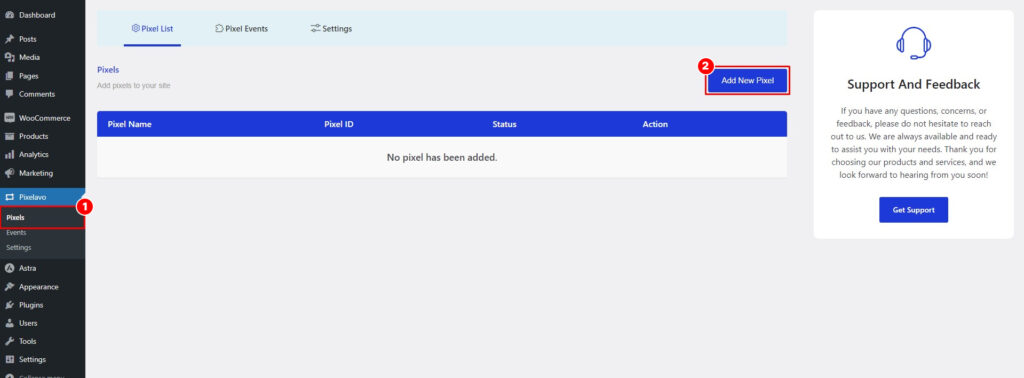
1. Navigate to the WordPress dashboard and click on the “Pixelavo” menu or the “Pixels” submenu under the “Pixelavo” menu.
2. Click the ‘Add New Pixel’ button to open a popup form for adding a Pixel.

Step Two:
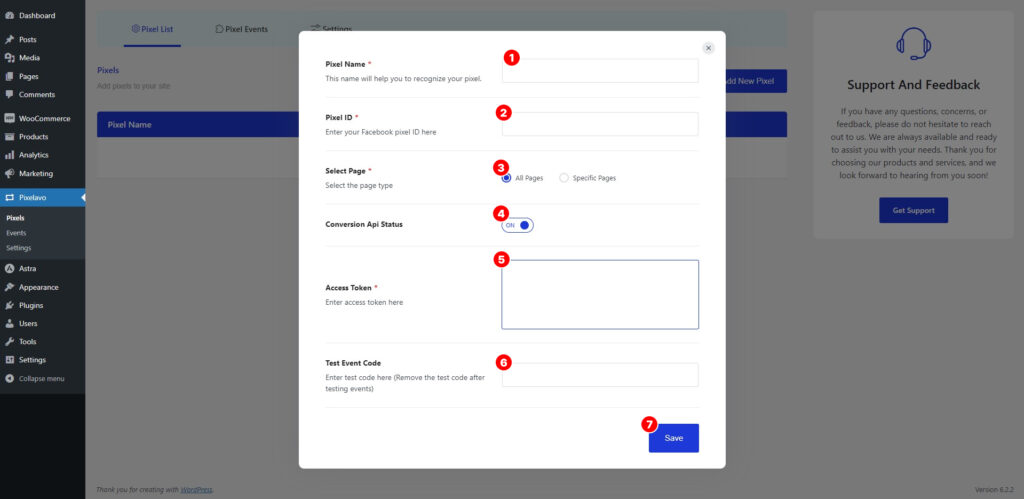
1. Provide a name for your pixel.
2. Enter your pixel ID. See where to find it.
3. Choose the page(s) where you would like to run this pixel. By default, it will run on all pages, but you can also select specific pages for the pixel to be active.
4. Set the Conversion API status to “Active” in order to enable the addition of Conversion API.
5. Enter your conversion API access token here. See where to find it.
6. Enter the event test code here to test the events.
7. Click the “Save” button to save the pixel.