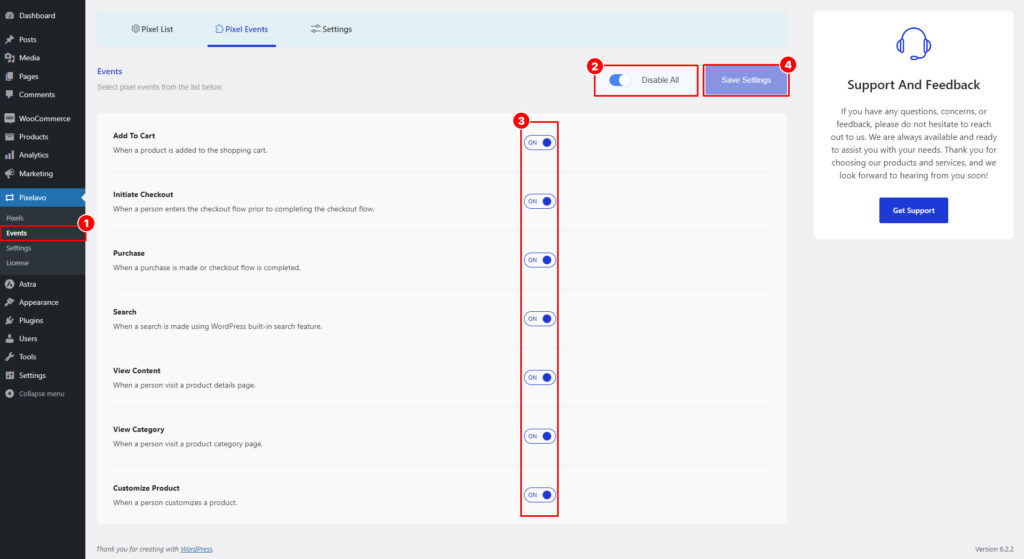
1. Navigate to the WordPress dashboard and click on the “Events” submenu under the “Pixelavo” menu.
2. To enable or disable all events at once, you can click either the “Disable All” or “Enable All” button located at the top.
3. Alternatively, you can enable or disable events individually by clicking on the switch button located on the right side of each event.
4. Click the “Save Settings” button to save all the changes.
Events Details:
1. Add To Cart: The “Add to Cart” event is triggered when a user adds a product to their cart. This event is valuable for tracking customer behavior and understanding their purchase intent. By analyzing this event, you can optimize your product offerings, pricing, and promotions to boost conversions and maximize revenue.
2. Initiate Checkout: The “Initiate Checkout” event is triggered when a user begins the checkout process. This event allows you to track the number of users who initiate the checkout and identify the percentage of users who abandon their carts. By analyzing this data, you can identify any barriers or friction points in the checkout process and implement improvements to enhance the overall purchase experience.
3. Purchase: The “Purchase” event is triggered when a user completes a purchase. This event is essential for tracking sales, revenue, and other key metrics related to successful transactions. By monitoring this event, you can gain valuable insights into your business’s performance and make data-driven decisions to optimize your marketing strategies and improve overall profitability.
4. Search: The event “Search” is triggered when a user performs a search using WordPress’s built-in search feature. This event allows you to track user searches and gain insights into the keywords and search behavior of your website visitors. By analyzing this data, you can optimize your search functionality, improve the relevance of search results, and enhance the overall user experience on your website.
5. View Content: The “View Content” event is triggered when a user views a product page. This event enables tracking of popular products and user interactions with your product pages. By analyzing this data, you can gain insights into the popularity of different products, understand user engagement and behavior, and make informed decisions to optimize your product offerings and improve the overall user experience.
6. View Category: The “View Category” event is triggered when a user views a category page. This event allows you to track the popularity of different categories and observe user navigation patterns on your site. By analyzing this data, you can gain insights into the most popular categories, understand user preferences and browsing behavior, and optimize your site’s category structure and content to enhance the user experience and drive engagement.
7. Customize Product: The “Customize Product” event is triggered when a person customizes a product. This event allows you to track and capture the customization actions taken by users on your products. By monitoring this event, you can gain insights into the level of product customization, popular customization options, and user preferences. This data can be used to personalize product offerings, improve the customization process, and enhance the overall shopping experience for your customers.


